When I was seven, my Mimi sat me down in her living room and taught me how to cross stitch. It was such a fun memory – picking my own thread color, stitching my name, and learning how to do something that seemed so ~adult~ at the time.
Since I first learned this fun hobby, I have advanced to semi-pro status. I still have a lot to learn, but I have upgraded from simple letters and back-stitching to massive samplers with different types of stitches and adornments. And during quarantine, I’ve had ample time to stitch multiple projects – partially thanks to my friend, Loren.
Loren wanted to learn how to cross stitch, so, I packed up a bag of supplies and visited her about a month ago to teach her how! Ever since, she has been so excited about all of her patterns and progress, and I’ve even had other friends approach me about how to best get started.
In the spirit of my very crafty grandmothers and mother, I thought I would sit down and try to virtually teach you the very basics of cross stitching so that you can start your own project! If you’re hankering for a quarantine activity, want to make fun Christmas gifts, or just want something to do with your hands while watching TV, then this is the perfect hobby for you to pick up. And, other than a few initial expenses, you won’t have to invest a lot of money or spend hours of learning. There are a few simple stitches to learn, and then you can run with it.
Let’s get started!
Tools Needed to Start

To get started with cross stitching, you really only need a few basic tools.
- Fabric (what you stitch your pattern on)
- Thread (whatever colors your pattern requires)
- Sewing Needles
- Scissors
- Pattern of Choice
I included this picture to give you an example of the things you might not already have. This is a pattern I purchased on Etsy, and I keep the pattern with the thread and fabric in a Ziploc bag to keep everything organized! This picture is just missing some scissors and a needle.
Reading a Pattern
Once you find a pattern you want to stitch, you’ll need to make sure you have the proper fabric and thread colors. Most patterns will essentially have a ‘guide’ with all of the information you need to know. The first thing you’ll need to know is the size and count of the fabric.
Cross stitch fabric comes in different sized counts – 14 count, 16 count, 18 count, and so on. This means that there will be ‘x’ many stitches per inch. So, the bigger the number, the smaller the design will end up once you are finished. The pattern will also let you know how many stitches tall and wide a design is; this allows you to estimate where you need to position the piece (in case you’d like to frame the finished product or set it in a hoop.)

Pattern guides will also give you a list of the colors of thread you will need, as well as the different types of stitches the pattern will require. Mostly, you’ll likely just be using a classic ‘x’ cross stitch, as well as back stitching. If you need to learn a different type of stitch, you can find examples on YouTube that are very helpful! (I’ve recently done this with the ‘French Knot’, which is another classic stitch!)
Starting Your Pattern
To start your pattern, you just need to pick a point to start stitching the design on your fabric! As I mentioned before, you will need to be a bit strategic about how you do this. If you want to frame your finished product, or set it in an embroidery hoop, you need to leave some room on the edges as a ‘buffer’ or margin so that it will look nice and actually fit.

If you’re like me, and you’re a numbers person, I found a really helpful resource on the Internet to give you exact dimensions: The Cross-Stitch Fabric Size Calculator. This website will let you put in the dimensions of your pattern, as well as the count on your fabric. Then, it will calculate how big your fabric needs to be for a frame or a hoop. This can be super helpful if you’re just starting out and aren’t sure how to judge the size of your designs yet!
The hardest part, in my opinion, is figuring out where to start your design. My Mom taught me to find the stitch in the very middle of your design. Then, you’ll find the very center piece of your fabric – that is where the direct middle of your design should be stitched.
For example, on this “The Office” pattern, I found the very middle of the design – which happened to be the ‘O’ of the office logo. I started there and then worked my way around in a circle.

From there, you can either start in the dead center, or you can mark the center (with a pencil or an extra sewing needle,) and count over enough squares to start at the edge or border of your design. This part just depends on what is easier to wrap your head around! For ‘The Office’ pattern, I stitched the Logo first, and then worked my way around in a circle.
On smaller patterns, like this Tennessee helmet, I like to stitch all of one color first, and then once I’ve done all of the stitches for one color, I’ll switch to the next one.
This decision making comes with time – if you’re a beginner, just start with what makes the most sense to you!
How to Stitch
First things first, you will need to cut a length of thread off of your ‘skein’ – aka your length of thread. It doesn’t matter how long it is in theory, but if you cut it short, you’ll have to replace it faster; if you make it too long, you could gets knots in your thread a little easier. Either way, just cut some thread and you can figure out your preference as you get better at stitching.
A typical skein is six pieces of thread bundled together. For most patterns, unless otherwise noted, you just need two strands to stitch. So, if you tap the end of the thread, you’ll see the strand separate a little. Grab two of those strands and pull them away from the others to separate them. Then, thread your needle and you are ready to start!
Explaining how to do a stitch might be difficult with words alone. Essentially, you’ll bring your needle up through the bottom of the fabric, and pull the needle and your thread through until you have about an inch of a ‘tail’ left behind the fabric (this keeps enough thread on the backside so that you don’t pull your thread out while stitching.) For a traditional cross stitch, you will make an ‘x’ pattern. I found this helpful video that shows how the actual stitching works, and also gives you a few different stitching styles to choose from. I would recommend the ‘English’ style for beginners, but I typically use the Danish style because it is easier for me to get into a good rhythm stitching that way.
If you need to learn different stitches, there are a ton of good YouTube tutorials out there to help you get a visual! I would just get a scrap piece of fabric to practice before putting the stitch on your actual project.
Ending Your Stitch/Burying the Thread
Once your thread gets so short that you have a hard time stitching, you will flip over to the back of your design (don’t worry if the back of your design is a bit messy – no one will see it when you’re done!)
Take your needle and push it through a tightly woven piece of your thread. Pull your needle and thread through this section of thread. You’ll probably want to do this twice. What exactly does this do? It ‘buries’ or secures your thread so that it doesn’t accidentally come undone during your future stitching. Once you’ve ‘secured’ your thread, you can cut the loose thread and re-thread your needle to keep moving forward!
At this point, you have the basics on how to stitch! Meaning, you have enough knowledge to get started – whoop whoop! But, how do you find patterns to stitch? And how do you know what colors to get? And how do you store all of this?
Have no fear! Before you go off to stitch like mad, I have some personal tips to help you out.
Finding Equipment/Patterns
Two places that I like to go to for cross stitching equipment are Hobby Lobby and JoAnn’s. Hobby Lobby is really good about having sales, and they always have a 40% off a regular price item coupon that you could use on a storage container for thread, a big piece of fabric, or a package of hoops (which would probably be the most expensive part of cross stitching.)
You could always purchase things off of Amazon, including big packages with multiple thread colors, hoops, and fabric bundles. I personally like to go to the craft store, because I can see all of my options and decide what to get. Also, for some patterns, you need a specific thread color, and the craft store will have thread labeled and organized.
Speaking of thread – does the number on the pattern matter? Can I use a different color? – Yes and No. If you want a mirror image of a pattern, then yes – get the exact thread number. If not, no! You can easily color match using your own eyes, or if you go to a store and they are out of the specific color you need, you can Google the best alternatives for that color and pick up a similar shade (I do this all the time!)
As far as needles and scissors and extra accessories – these are just a guessing game and up to personal preference. That is why going to a physical store can be helpful, because you can see the available tools and grab things that will help you.
Personally, I enjoy having a frame to hold my fabric taut on bigger projects. I also use a yellow marker to highlight the sections of my pattern that I’ve already finished so that I don’t get confused. Other than that, I don’t have a lot of excess equipment.
For patterns, ETSY has tons of patterns that are modern, pop culture related, and they have old school patterns for sale as well. The nice thing about people who create patterns on ETSY is that you can immediately download the pattern and print them out. But, if you want more old school samplers and patterns, I suggest finding a used book store in town or going to an antique store/thrift store, or a used book store.

Personal Cross Stitch Preferences
Finally, here are a few tips that have helped me on my cross stitching journey!
- Mark the middle of your cross stitch pattern on your fabric and count to make sure you have enough room to stitch your whole design.
- Decide if you want to frame or hoop your design before you get started so that you leave a big enough margin around your design.
- Stitch with plenty of light, because this can be hard on your eyes.
- Use ziploc bags to organize your project – I put the thread colors, fabric, and printed out pattern for a single pattern/project all in one bag to keep everything all in one place!
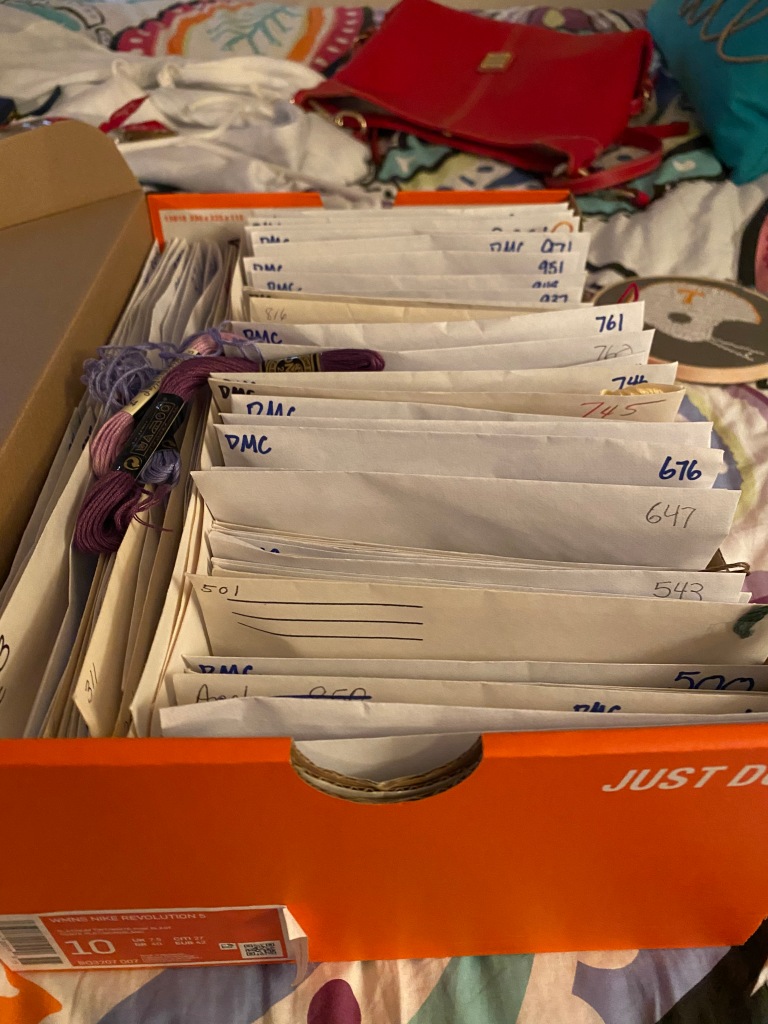
- Find a way to organize your thread. I put my thread in envelopes, and then have it organized in a shoe box. Then, I know what numbers/colors of thread I have and don’t have to search through a bag of colors looking for a specific number.
I hope this is a helpful guide to get started in the world of cross stitching. If you have any questions that you’d like to ask, please leave a comment below and I’ll answer/help as much as I can.
Happy Stitching!
